How To Setup A DigitalOcean Server for WordPress
So I recently decided to give DigitalOcean a shot at hosting BestTechie. We’ve been using it for KYA and have been happy with the performance, so I figured why not? One of the major things that was super important to me was that I wanted to make my DigitalOcean server (or as DigitalOcean refers to them: droplets) for BestTechie as “managed” as possible. This meant I didn’t want to have to (or even feel like I had to) worry about making sure it was up-to-date, well configured, running securely, etc. I just wanted the server to manage itself for the most part.
After some research and even setting up an initial droplet on my own, I discovered an incredible service called ServerPilot. In short, it does everything I wanted and it’s free (they also offer additional paid features, but so far I’ve managed just fine with the free tier).
Here’s how it works
You create a brand new, fresh droplet on DigitalOcean and then provide ServerPilot with access credentials, the ServerPilot software will then automatically configure the brand new droplet for you within minutes.
More specifically, ServerPilot configures a LAMP/LEMP stack on your server. LAMP stands for Linux + Apache + MySQL + PHP. However, ServerPilot also configures Nginx on your server in addition to Apache and this type of configuration is often referred to as a LEMP stack because Nginx is pronounced “Engine X.”
So why install Apache and Nginx? Well, because it’s the smart thing to do. ServerPilot configures Nginx as the public-facing web server because it is much more scalable than Apache. Unlike Apache, Nginx can handle handle tens of thousands of simultaneous client connections. In other words, you can handle more traffic with a less powerful server meaning you end up saving money on server bills.
But it’s not just how they configure your web stack that makes me love ServerPilot, there are tons of other little things in terms of their configuration that make me think these guys really thought everything out.
For example, for your SSL-enabled apps/websites, Nginx also provides extremely efficient SSL handling and HTTP/2 support. HTTP/2 is much better than it’s predecessor, HTTP 1.1, so you will definitely want to take advantage of it by enabling SSL. Additionally, ServerPilot configures your server so each app or website has its own PHP process pool so you can run one website using PHP 5.6.x and another website on the same server with PHP 7.0.x.
As an aside, the folks over at ServerPilot had the final release of PHP 7.0.0 deployed to all of their customers within two days from its release (they had the Release Candidate available before that though as well). They are fast.
That stuff is all great, but here’s one of the bigger reasons why I like using ServerPilot with DigitalOcean: they keep all the software up-to-date automatically and they have a pre-configured firewall to keep your server secure. Much less to worry about that way. And of course, I still have full access (including root) to the server via SSH and SFTP.
Another great thing I’ve found is that I’ve been able to make edits to the PHP configuration on my server by creating an individual .ini file within my apps directory so those changes would only affect that particular app. Very nice. Last thing that’s definitely worth mentioning is that ServerPilot has an incredible database of help documents which have answered literally every question or tweak I’ve wanted to make. Their tech support has also been very good and helpful both times I’ve reached out.
Here’s how to setup DigitalOcean
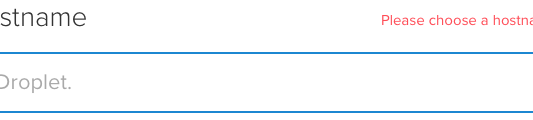
Register/Login to DigitalOcean, then go to create a droplet and give it a name.
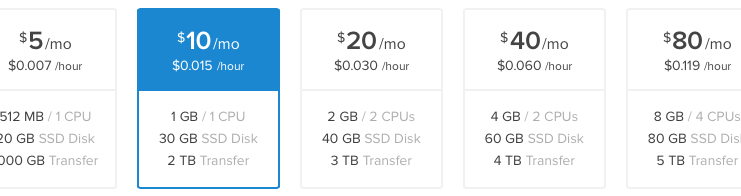
Once you have entered a name for your droplet, you need to select the size of the droplet, which basically means you need to pick a server that can handle your website/app. One thing to note, the amazing thing about DigitalOcean’s droplet’s is that you can easily and quickly upgrade them anytime, pretty much on the fly. So don’t worry if you find yourself outgrowing the current droplet size you selected.
Next you need to select a location (the datacenter) of your droplet. Typically it’s best to pick a location that’s close to you or the majority of your visitors/users.

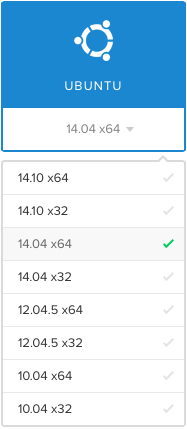
With the server location selected, now you have to choose the right operating system. ServerPilot runs on 64-bit Ubuntu 14.04, so choose the option shown below.
Note: DigitalOcean offers various different types of pre-configured images — do not, I repeat, do not select one of those if you plan to use ServerPilot. ServerPilot requires a clean/fresh install of Ubuntu to work.
In the Selection Additional Options area, I would definitely recommend selecting Backups. It doesn’t cost much extra to have them done by DigitalOcean. From the DigitalOcean FAQ:
The pricing for backups is 20% of the Droplet; so for a $5 Droplet – backup is $1 per month. For a $20 Droplet – backup is $4 per month.
By the way, backups done by DigitalOcean occur once per week. So if you want something that is more frequent, you will either need to set something up yourself or look at additional backup services.
In terms of the rest of the option boxes, you should leave those unticked.
![]()
Next, click Create Droplet, and the hardest part is done. Once you receive your IP address and password by email from DigitalOcean now you’re ready to have ServerPilot do its thing.
Here’s how to connect DigitalOcean and ServerPilot
So now you have to head on over to the ServerPilot website and create an account so you can connect your server and get started.
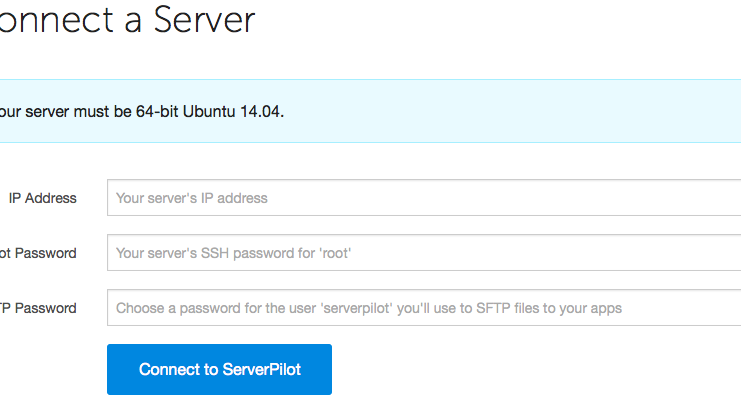
From your ServerPilot account, go to the Servers page and click + Connect Server.
Here’s where you enter the IP address of your DigitalOcean droplet, the root password emailed to you by DigitalOcean, and a password (of your choosing) for the SSH/SFTP user serverpilot. Then, click Connect to ServerPilot.
Now ServerPilot will check the connection and begin installing. It will also set up the firewall; PHP 5.4, 5.5, 5.6, and 7.0; Apache configured with .htaccess and mod_rewrite enabled; NGINX; MySQL; and more.
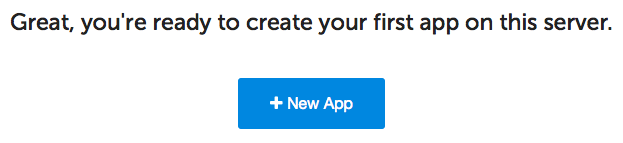
Once the installation is complete, your server will show as connected in ServerPilot, and you’ll be prompted to create your first app/website.
Note: when you see the word “app” on ServerPilot it is interchangeable with the word website.
So once you click that you can install things like WordPress, PHPMyAdmin, and other types of software easily from your ServerPilot account. Of course you can install anything you like manually as well. It is your server after all.
If you have any questions, comments, thoughts feel free to leave a comment!