The best Instagram automation, tools, and tips for 2021
Looking to get your brand on Instagram? In this article we're going to let you in on some helpful tips to set up a killer Instagram workflow that will help grow your audience!

Instagram is made for people to do with it what they please, which is exactly why we love it. But no rules means no instruction manual, so setting yourself up for success can seem difficult when you're not sure where to start. In this article we're going to let you in on some helpful tips to set up a killer Instagram workflow!
1: Change your name
I know, it sounds weird, but we're not talking about legally changing your name. When searching for specific people on Instagram, all you have to do is search their name and, voila! They appear. Same goes for searching specific keywords/niches. Your username should be your brand, but your name itself is what shows up underneath a username. Consider it more of a description. At BestTechie, our main focus is product reviews and our podcast, TechieBytes. Therefore, we opted for "BestTechie: Reviews & Podcasts." Now, any time someone searches "reviews" or "podcasts," we'll show up in the list!

To do this, go to your Instagram profile > Edit Profile > Name. Simple, right?
2: Select an appealing profile picture
When displaying your brand, you need to be the brand. If your brand is yourself (influencers, coaches, personal accounts), opt for a colorful and high quality photo of yourself that you feel displays your character best. If your brand is fashion, select the outfit that shows off your sense of style. If your brand is your business, it's time to make a logo!
There are plenty of resources on the world wide web for making a logo. For beginners, I'd recommend FreeLogo Design and LogoMakr. For those of you who are a bit more tech savvy or are willing to dedicate time into learning it, Adobe Photoshop provides much more user control and endless options of how to create the perfect logo.
Once you've got a profile picture that defines your brand, go to your Instagram profile > Edit Profile > Change Profile Photo > Choose From Library.
3: Download a storage app to transfer photos from one device to the next
You'll see why this is important once we get to tip #4. It's important to be able to transfer photos from phone to PC and vice versa. Having your photos on both devices allows more flexibility in what you can do with them. It allows you to edit photos you took on your phone in Photoshop, make posts on the Instagram website, or schedule/organize posts on a content calendar.
We recommend Google Drive (available on iOS or Android) or Dropbox (also available on iOS or Android). It really comes down to preference or ease of use when deciding which app to use. Both Google Drive and Dropbox offer a certain amount free storage: Google Drive offers 15GB of free space while Dropbox offers 2GB. But if you refer friends and family to Dropbox, you receive an additional 500MB of storage per person and can accrue up to 16GB as a limit.
4: Utilize an Instagram scheduler
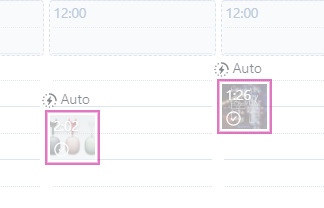
Picture this: You're laying in bed at 10pm. You've just had a "Eureka!" moment and thought of an amazing post to make on Instagram, it's way too late in the day to post and get optimal interaction, but you don't want to lose the idea. Scheduling programs like Later are perfect for this.
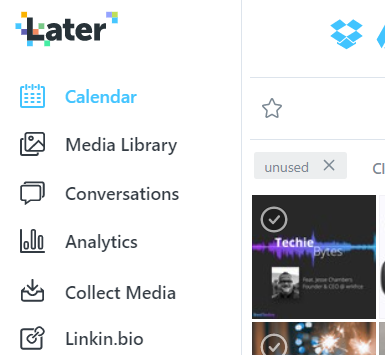
Later provides a smooth and easy way to upload media, schedule posts, go over analytics, and include something absolutely vital to any Instagram brand: Linkin.bio. With this, you can connect all of your posts or Instagram stories to any link of your choice. Selling a new product? Advertising some crazy cool photos is only half the battle. Being able to direct your audience directly to your store or blog post means easy access for the user. And in today's day and age, instant gratification is everything.
5: Find your aesthetic and plan your feed
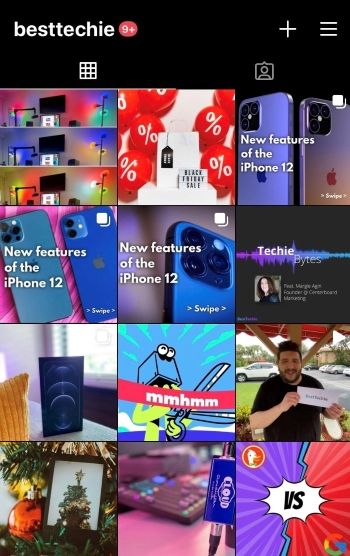
Every Instagram profile has a certain aesthetic, and feed impressions are vital to growing (and keeping) your following. It's helpful to choose a certain color scheme that best fits the vibe or style you're trying to go for, and stick with it. Our brand colors for BestTechie are a vibrant yet cheerful blue and purple, so we stick with vibrant and cheerful photo edits, filters, etc. If your goal aesthetic is more soft and subtle, pastels will convey that to your audience.
Wouldn't it be nice to be able to see what your posts will look like on your feed before posting them? Well you're in luck, because with apps like Preview, it's possible to upload your photos and arrange them in whatever order looks best so that you know exactly what photos to post, and what order to post them in. Preview is available on iOS and Android.
6: Captions, hashtags, and emojis (oh my!)
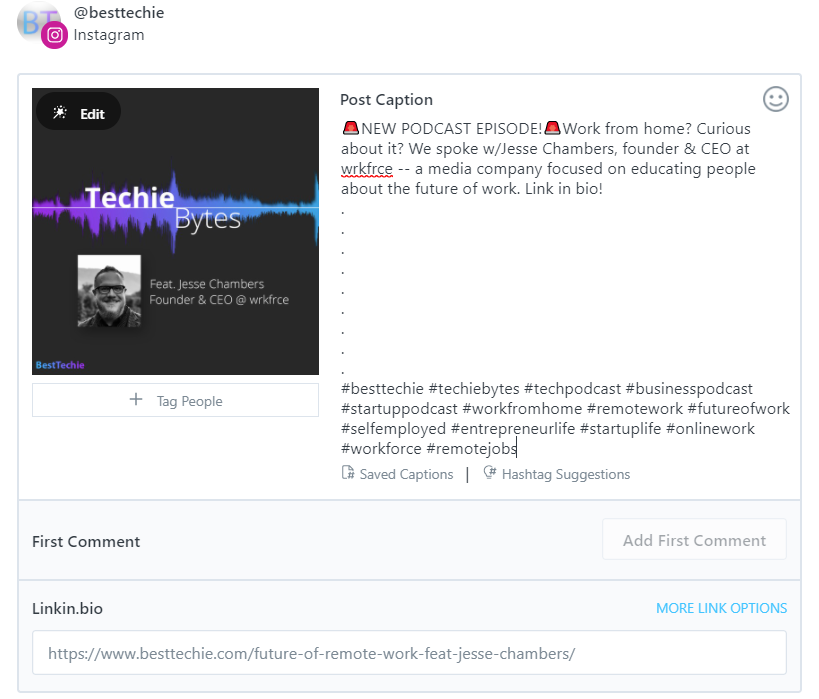
When typing out a caption, keep in mind: less is more! Captions that are short and to the point will draw your audience in faster. Toss in an emoji or two that best captures the essence of your post to keep things exciting. Having to press "see more" to fully read something may not seem like a daunting task, but it's something that users rarely do. You may be wondering: "But where will I put my hashtags?" We've got you.
Remember what I said about how people rarely press "see more"? Of course you do, that was only 10 seconds ago. But that little tidbit of information is the golden key to understanding where you should be placing your hashtags. By placing a "divider" (after your caption is typed out, press Enter > . > Enter > . and repeat) between the caption and hashtags, the post will look cleaner and less jumbled. Visible hashtags are sooo 2015.

7: Hide hashtags in Instagram stories
Hashtags aren't just for Instagram posts – they work wonders for Instagram stories, too! Using hashtags in your story provides that extra exposure necessary to boost your follower count and find an audience that fits your demographic. But again, they're kind of an eye sore. Here's how to hide them.

When sharing a post on your story, select the "text" option and type out a few hashtags that best summarize your post, then drag the photo to cover the text. This "hides" the hashtags from the audience. If you're not sharing a post and simply posting on your Instagram story, stickers or additional text with background bubbles are a great alternative for covering hashtags.
Pro-tip: You may have noticed when sharing a post to your story that the background colors of the photo automatically fill up the empty space behind it. If those colors aren't appealing or fitting, you can change this by selecting the "draw" tool (little squiggly guy), using the color selector to choose a color, and then holding your finger down on the background for 3 seconds.
8: Customize your text in Instagram stories
The preset text colors or Instagram are great for beginners, but don't allow a whole lot of room for variety. Have no fear! The color selector is here! To change the background of a text bubble, hold down any color for 2 seconds and you'll see the color range appear. You can then drag to the color that looks best and release. We opted for a darker shade of blue.
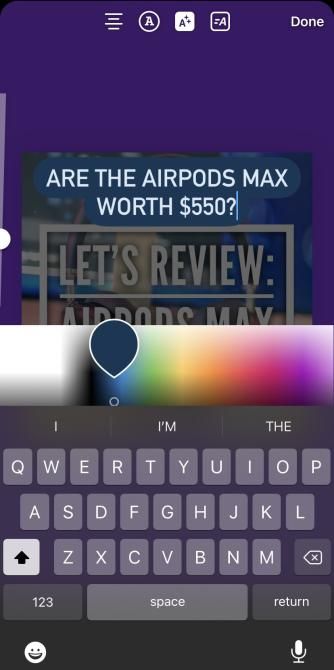
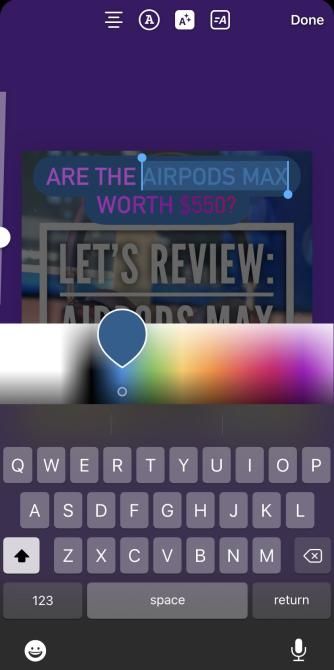
Now, here's the kicker: you can change the color of each individual letter. Yes, you read that right. After the text is typed out, tap the text 3 times. This will activate the "select all" feature that we're all familiar with. As you'll be starting with the very last character of text, simply use one finger to move the highlighted portion to the left to the upcoming letter while using the other finger to slide on the color picker. Whatever text you have selected will change to the color your finger is hovering on until it is un-selected. With this trick, you can make ombré text, alternating colored text, and much more! Have fun with this one!
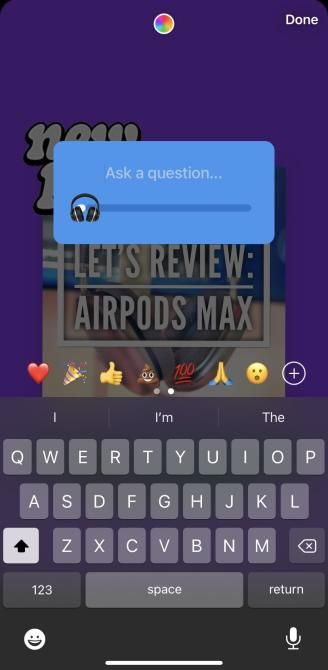
9: Bring your audience into the conversation
Your audience wants to be part of the conversation! Using polls, questions, and emoji slides are a fun and easy way for followers to engage with you. Additionally, you gain knowledge about your audience which then furthers your ability to appeal to them with future posts. Asking for opinions and feedback is the best way to figure out what works and what doesn't.
The emoji slides aren't just limited to a smiley face and a heart, either. By swiping the options, you'll see a "+" appear. With this, you can use any emoji that meshes with your story or applies to what the audience is sliding in response to. Unfortunately, as of right now there isn't a way to change the background color, but you do have some customization options.

By utilizing these tips, you'll soon see that there's so much more to Instagram than meets the eye. The good news is there are tons of tools like the ones listed in this article to help you along the way. What are you waiting for? Get to planning, and start posting today!