Promise Pegasus3 R6 review
Promise recently updated their Pegasus series of products to support Thunderbolt 3, like the Pegasus2 line before it, the updated Pegasus3 product line comes in three models: the R4, R6, and R8. The R4 comes with 4 drive bays, the R6 with 6, and you guessed it, the R6 with 8 drive bays. It used to be that Promise had pre-configured models that they sold on their site, and while they still do offer pre-configured models, the company now also offers the ability for you to configure a built to order (BTO) model.
The BTO Pegasus3, which can be configured on Promise’s website, allows customers to choose what kind of drives as well as the amount of storage they’re looking for. For example, if you went with the R6 model you would have the option to choose the number of traditional hard drives you want (if any) and the amount of solid state drives you would want (if any). Promise offers a wide range of options when it comes to traditional hard drives, you can select anywhere from 3TB to 10TB drives. On the SSD side of things, the choices a bit more limited with the only options being 1TB or 2TB SSDs. Additionally, it’s not currently possible to buy a Pegasus3 R6 and only buy four drives–the company currently requires you fill all the drive bays when purchasing any of the models, which is a bit annoying (at least to me).
Once we got the Pegasus3 R6 unboxed, we started testing it.
Promise Pegasus3 R6 Review
The R6 model that Promise sent to us included 4 2TB SSD’s and 2 10TB HDD’s. It’s worth noting that according to Promise typical HDD performance will be approximately 200MB/s reads and 200MB/s writes, per drive and typical SSD performance will be approximately 500MB/s reads and 500MB/s writes, per drive. We’ll touch on that in a bit, but first, I want to discuss setting up the Pegasus3 R6 with my Mac.
Setup and Configuration
The first thing you’ll have to do is install the Pegasus3 drivers on your computer (which can be found on Promise’s site). After the drivers are installed you will need to download and install the Pegasus3 Utility (which can also be found on their site)–this will allow you to setup and configure the drives for use on your computer. Once both of those are installed, plug in the Pegasus3 into your computer via one of the two Thunderbolt 3 ports on the back of the device and open up the Utility app. You should then see a dashboard page within the app that looks similar to the one in the screenshot below.

From there you will want to create a disk array. The nice thing about the Pegasus3 Utility is that it will allow you to split up the drives into more than one array. For example, I was sent an R6 with four SSDs and two HDDs. Obviously for maximum performance I wouldn’t want to have the HDDs in a RAID with the SSDs, so using the app I created two different arrays. One was called SSD RAID and one was called HDD RAID. This meant my SSD RAID, which I configured in RAID 0, wouldn’t be impacted by the HDDs which are significantly slower.

The last step to get everything configured and setup was to create logical drives for each array, which the Pegasus3 Utility also makes very easy to do via the Logical Drive section of the app. Once you’ve gone ahead and created the logical drives from the disk arrays, your brand new RAID(s) will appear on your computer and be ready for use.
DISK & RAID Speed
One thing I noticed when I first unboxed the Pegasus3 R6 was that while the device uses Seagate IronWolf Enterprise HDDs, they didn’t use any special SSDs. In fact, they used Micron SSDs in the unit they sent to me, which are OK, but obviously you could buy a higher end SSD on your own. Nonetheless, in our tests using Aja and Blackmagic, the drives and RAID speeds were better than advertised.
SSD Test

HDD Test

Additionally, transferring data to and from the R6 and my MacBook Pro was extremely fast over Thunderbolt 3. Transfer speeds were definitely faster when utilizing the SSD RAID as you would expect. The large file transfers I conducted took often under one minute to complete. I also had a very good experience using the SSD RAID over Thunderbolt 3 for video editing–being able to utilize the SSD RAID as a scratch disk improved my editing and save times dramatically (compared to when I used the HDD RAID).
Design
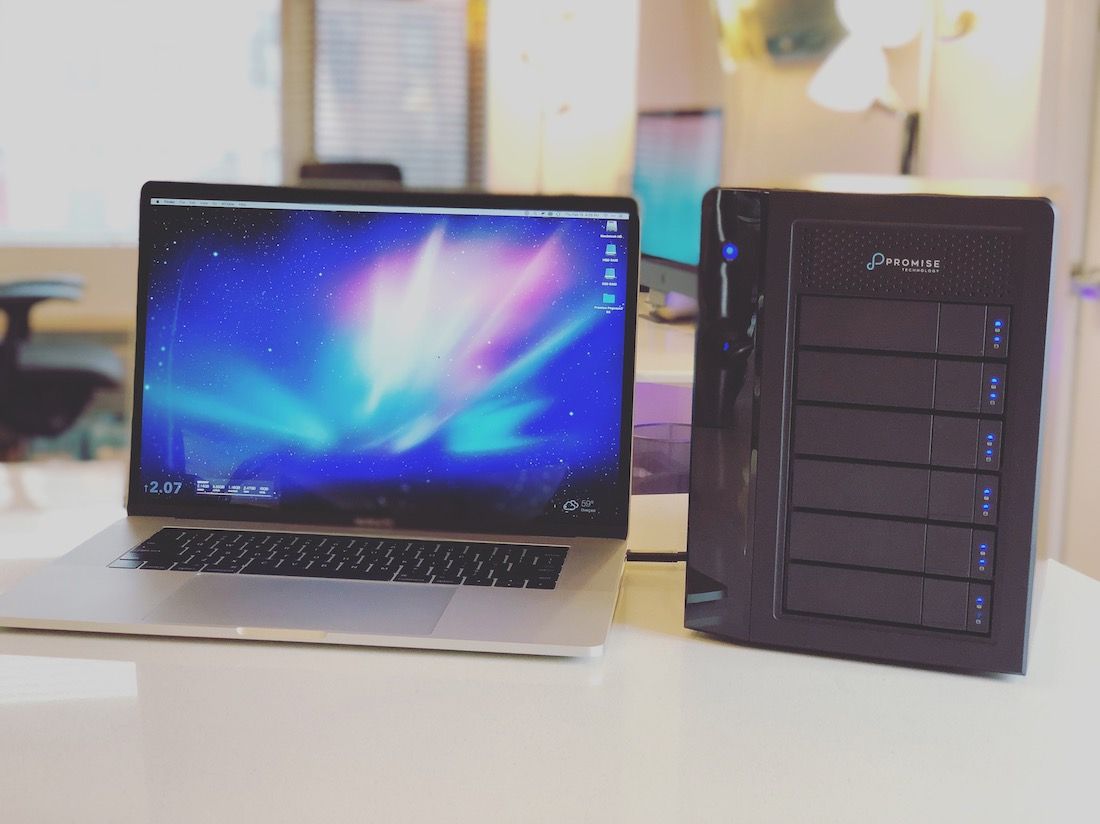
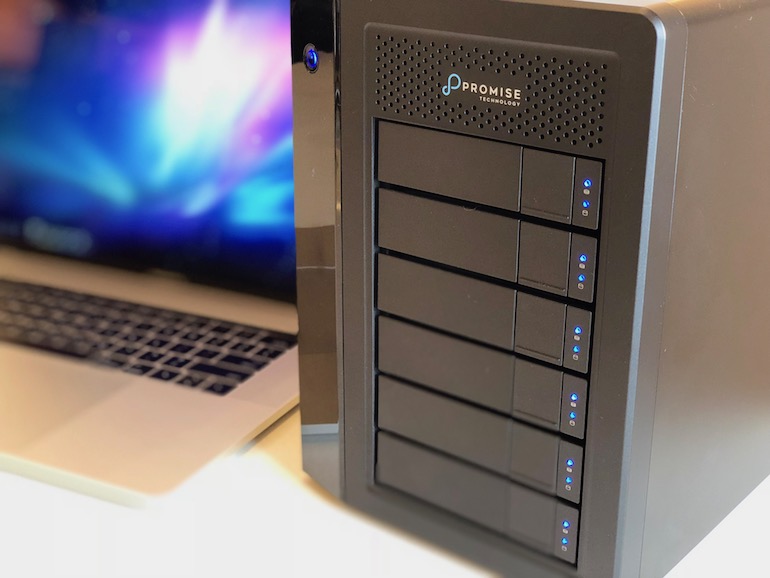
The Pegasus3 R6 is actually smaller than I anticipated it would be when I saw the photos online so that’s a definite plus. It’s all plastic but feels fairly well-built. The drive bays are easily accessible via the square button on the front of the device, simply press it, and the bay will pop open. The bays can accommodate either a 3.5″ drive or 2.5″ drive. The Pegasus3 Series come with two Thunderbolt 3 ports on the back (as I mentioned before), one is to use to plug into your computer, and the second can be used to daisy chain up to six additional devices.
Pricing & Verdict
Pricing for the BTO Pegasus3 models starts at $1,499. Overall, I’m impressed with the combination of the hardware and software offered by Promise here. I think the ease of setup and configuration along with the ability to now customize the storage options to your needs is a big plus. I’m also happy with the performance I’ve seen. Clearly this isn’t a product that’s geared towards everyone but if you do a lot of video and/or photo editing or are looking for a great solution to store a lot of data and that also has the ability to be upgraded well into the future then I think you’ll be happy with any of the Pegasus3 models.
WATCH: Unboxing the Promise Pegasus3 R6